v3.2: Monitor versus rule alerts
As with all major releases, we're covering the new features and improvements in v3.2 through an in-depth blog series. So far we've taken a look at;
- Our Root Cause Reveal feature and Alert Enhancements
- Our new licensing model
- Massive Performance Improvements
- A new Open Access engine
For those of you who'd prefer a one-stop summary of all features and improvements, check out our "What's new in v3.2?" blog - but seeing as you're here, we're guessing you want to get to grips with the tweaks we've made regarding Monitor vs Rule alerts, so let's jump right in...
Alert Enhancements – Monitor vs Rule Alerts
We all know that there’s a perennial problem with SCOM alerts - one that causes SCOM admins no end of headaches. You've probably told them a thousand times, and yet they still close Monitor alerts. Arrrgghhhh!!
Now, we all know the drill. Don’t close Monitor alerts, go fix the actual issue and the alert will automatically close itself. If you don’t, you lose visibility of the specific issue and the yet dashboard will still show red, because Monitors are what affect the actual health state of an Object.
And yet, again and again your users go and close Monitor alerts. It’s a story as old as SCOM itself. Rule based alerts, fine, go ahead and close them if you don’t think they’re an issue, but please don’t close Monitor alerts!
But we can't really blame the users - it's a tricky area even for an experienced SCOM admin and why should your users need to remember the intricacies of SCOM when they just want to get on with solving one of the dozens of issues they’re facing?
In SquaredUp v3.2 we’ve taken several steps to help users better understand the distinction between Monitors and Rules and prevent Monitor alerts from being closed (if your users are using SquaredUp, of course ?).
(For more thoughts on that, why not check out Martin Ehrnst’s blog on How to Get Your Colleagues Engaged with SCOM)
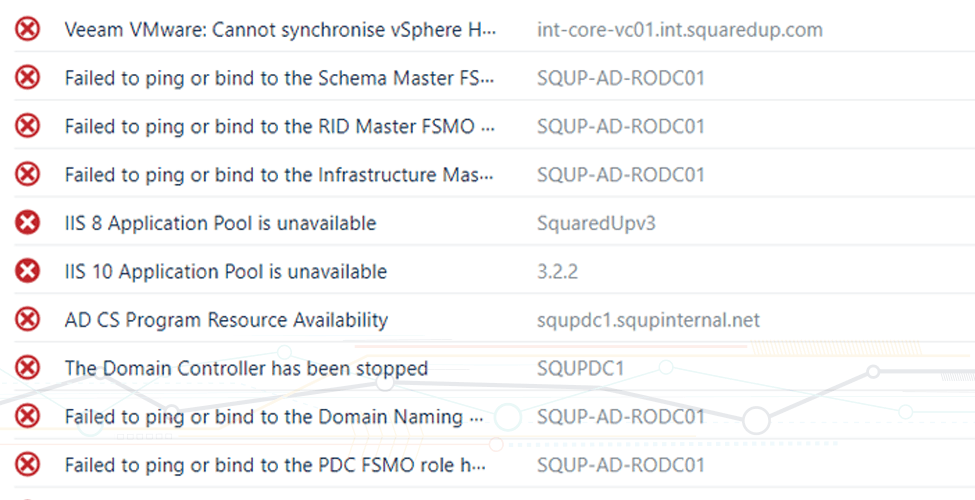
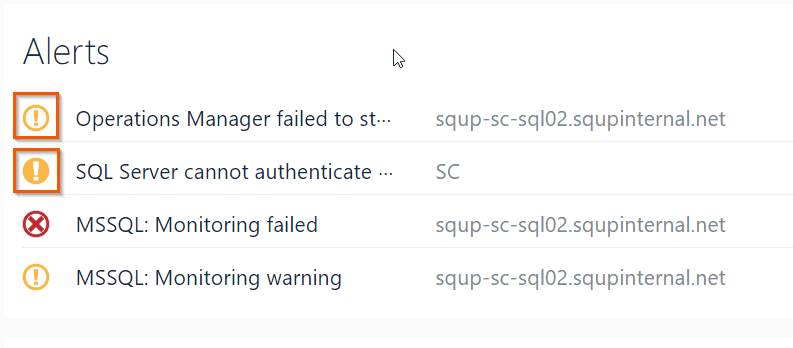
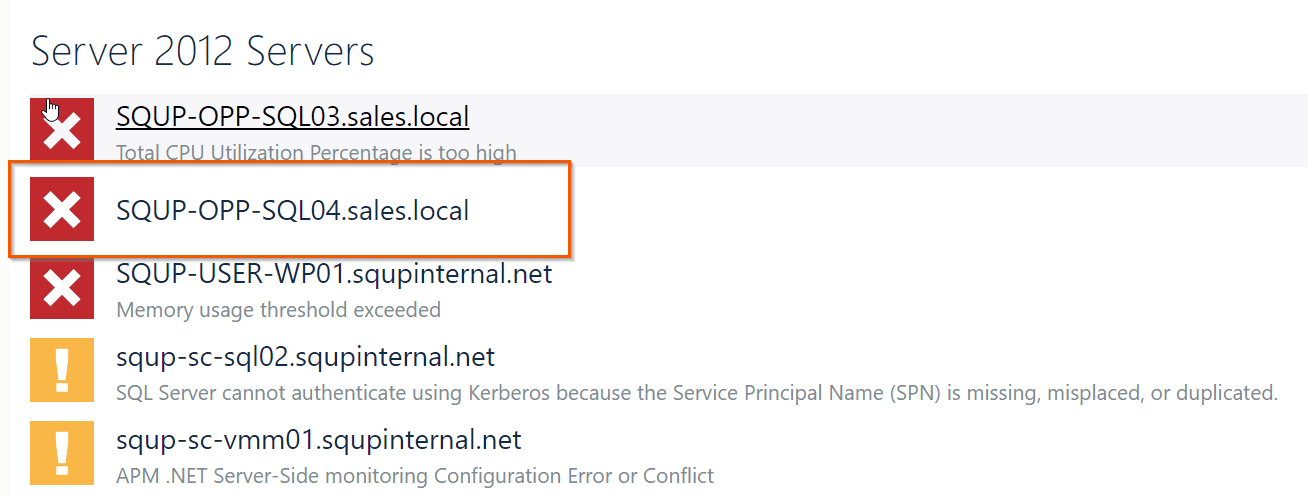
Firstly, we've taken the decision to use different icons to distinguish between monitor and rule alerts everywhere within SquaredUp. Now, when you see a solid-looking alert icon (one that's a bit like the health state icon, but circular) that’s telling you that the alert is affecting the health state of the object because it’s been raised by a monitor.
When you see a hollow-looking icon (one that's different from the health state icon) that’s telling you that the alert isn’t affecting the health state of the object because it’s been raised by a rule. Simple.
We’ve also made it much more difficult for users to ‘accidentally’ close Monitor alerts, or to not understand the impact of doing so.
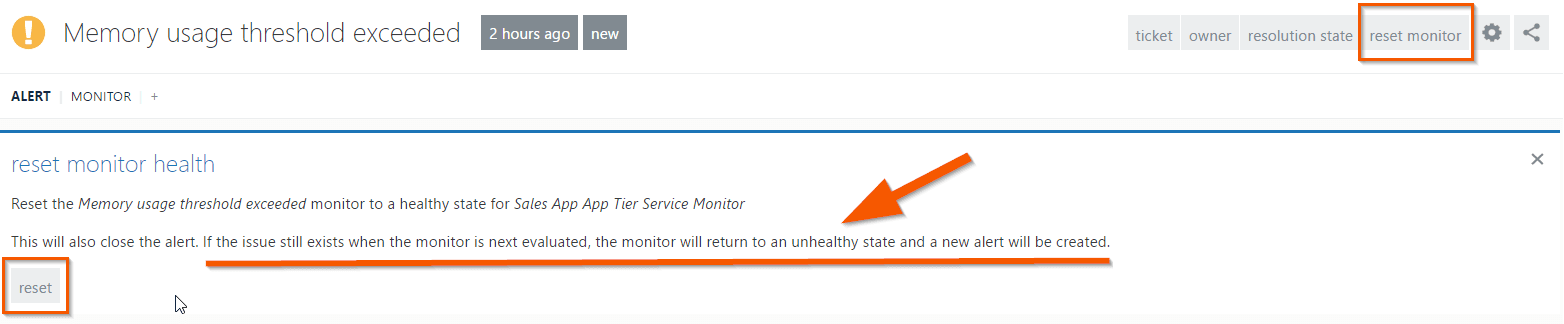
Now in v3.2, when a user tries to close a Monitor alert, they get a very clear warning;
This is a monitor alert which is affecting the object's health state and should not be closed manually.
The alert will close automatically when the monitor returns to a healthy state. To force a reset of the monitor, use the 'reset' action on the alert view.

After being presented with the warning, in order to actually close the alert, the user must go through a two-step process;
- Confirm that I understand and I want to close the alert manually
- Hit the Update button
Not so easy to accidentally close them anymore!
This has also been supplemented by giving the user the ability to reset the Monitor from the alert page, with a new 'reset monitor' button in the toolbar, together with a clear explanation of the effect of resetting the Monitor.
So, there you have it, no more excuses for your users, no more incorrectly closing Monitor alerts and clear visibility for everyone if a Monitor alert’s been closed without the underlying issue being addressed.
If you found this blog useful, then you might want to check out a previous blog post on our new ‘Root Cause Reveal’ feature. It's pretty sweet.